Measure your race sag BY YOURSELF!
October 8th, 2009 ~ Harry 'Moto'
Is your girlfriend impatient while she helps you to get your race sag set? Is there suddenly nobody around anymore when you mention 'Race Sag'? Tired of trying to work out what "Three of the little mark thingies past the 22" means? I've found a solution. This setup will allow you to set your own race sag without math, and without a helper. It's quick and dirty, made of stuff I had. You'll have different stuff, so just work it out with what you've got. The main thing is the bearing; you need something to reduce friction for this to work well. I tried it originally with a bit of PVC pipe, and there was way too much drag between the tape and the PVC. With the bearing it's quite free, and quickly and accurately responds to tiny movements in the bike's height.
This is what you'll need, roughly. There are elegant, proper ways to do this; but this ain't the place for that. We're gonna 'git-r-done' without big money or cool stuff. I used a paper tape measure from a department store (marked in inches AND mm), some string, a clothspin, a string grabber thing from a pack or something I threw away, a washer, a bad mainshaft bearing I pulled recently, a 15mm socket, a spring powered clamp, 2 door shims, zip ties, a Monster can, a sharpie marker, and you guessed it... Duct Tape!
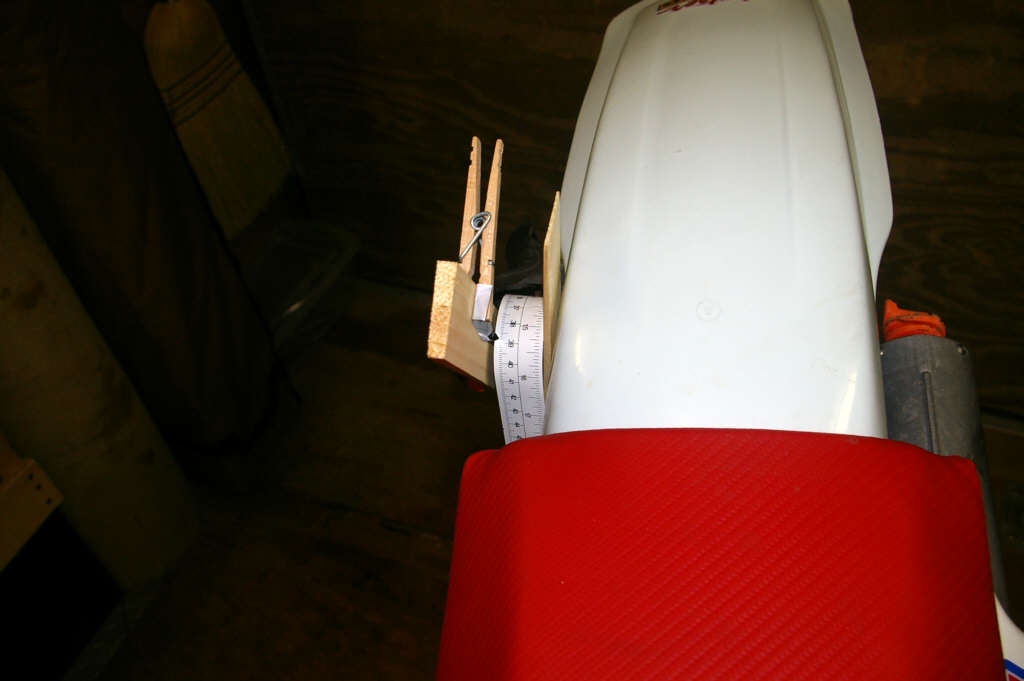
This is what it looks like all set up. You read the difference in rear end height (almost) directly off the tape.
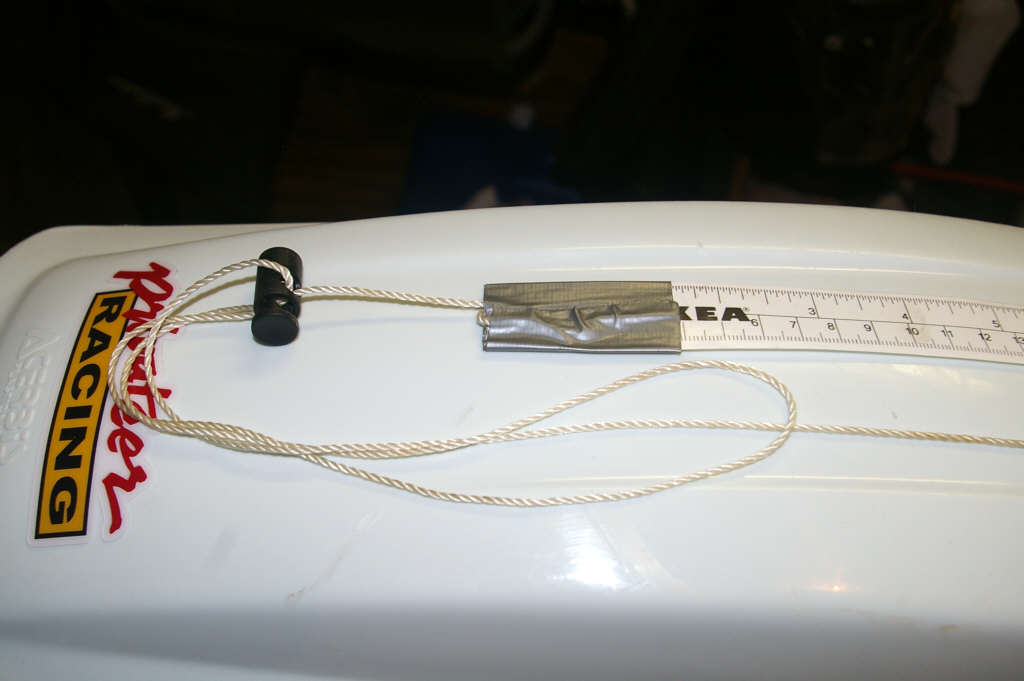
First, you get your paper measuring tape (I'm going to get a fancy cloth one soon. This one came from some department store somewhere.) and tape the huge washer to one end and the sting to the other end. If you have a cool string grabber thing from a pack, it's very handy for adjusting the length of the string at set-up time.
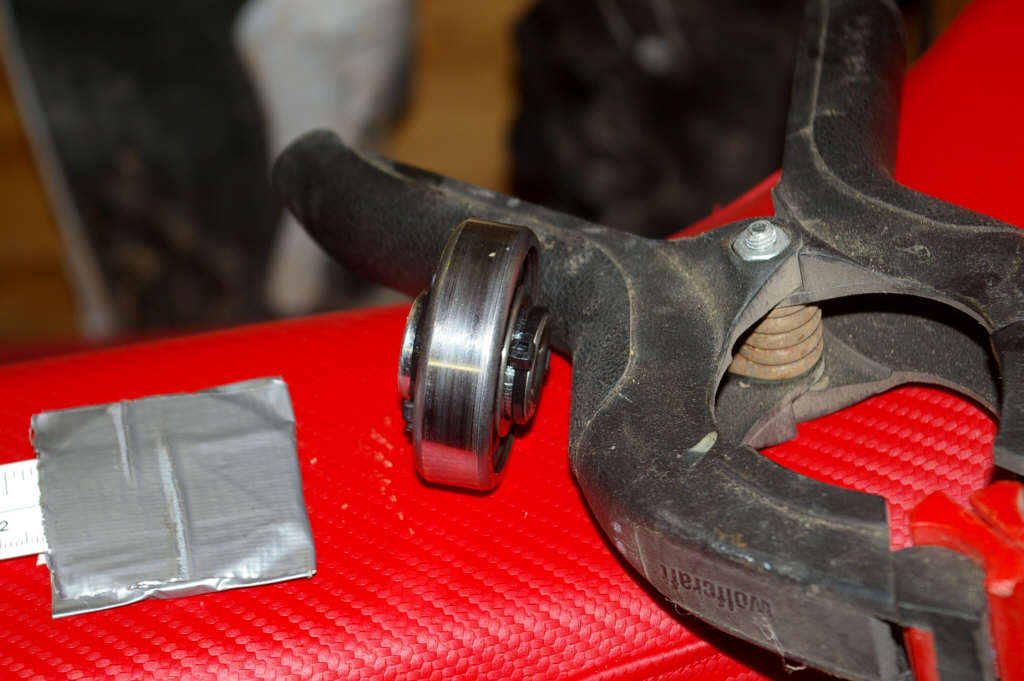
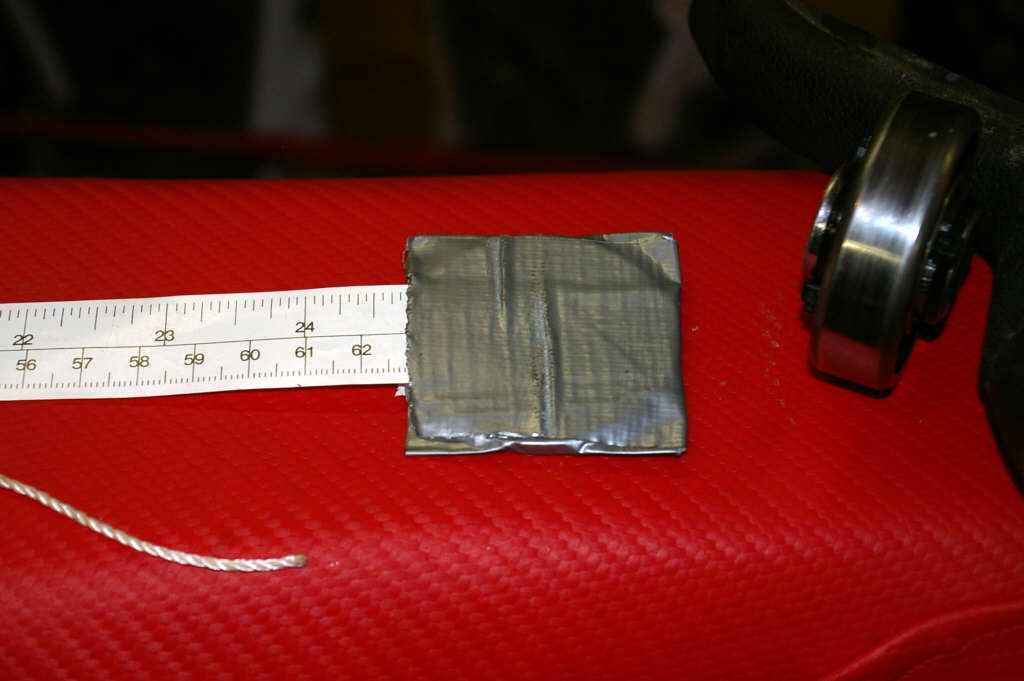
Now get the bearing and find something a little over an inch long that fits inside fairly well. For me, this was a 15mm socket out of a spare set. Insert it into the bearing and zip-tie both ends, just because it makes it easier to handle.

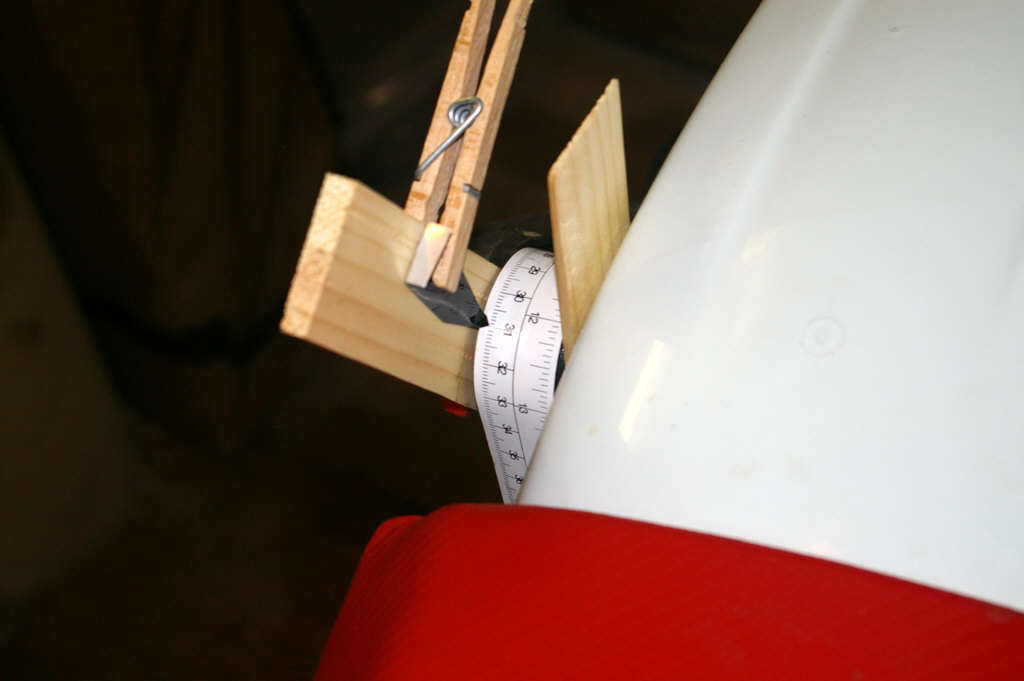
Now cut a pointer out of the Monster can, and bend the pointer end up for reading the scale and the back end up for handling the pointer while you clamp it.
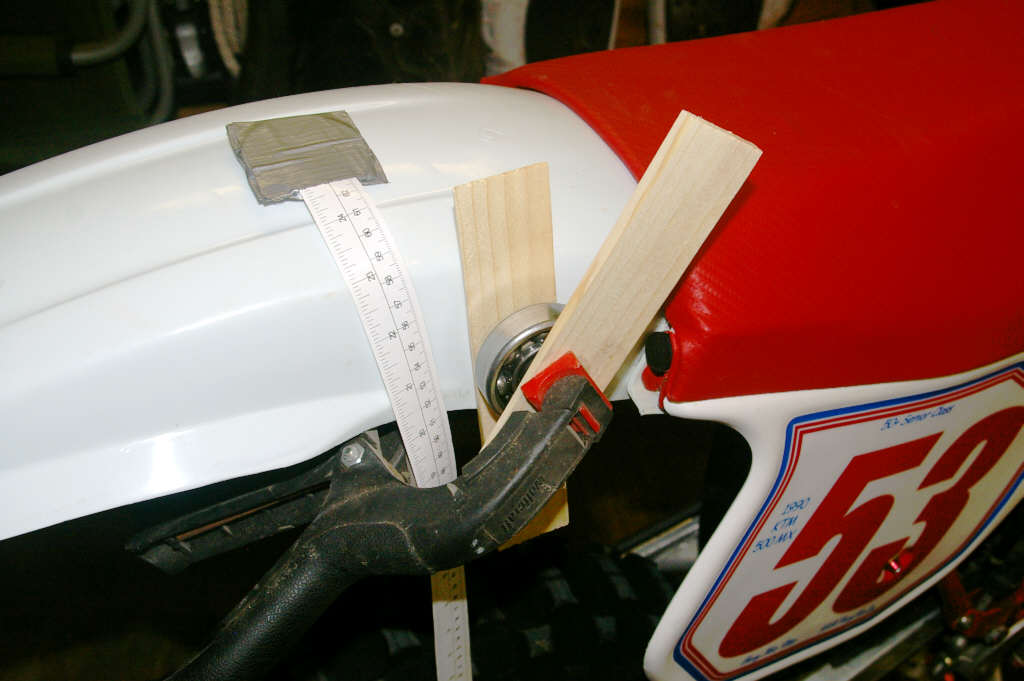
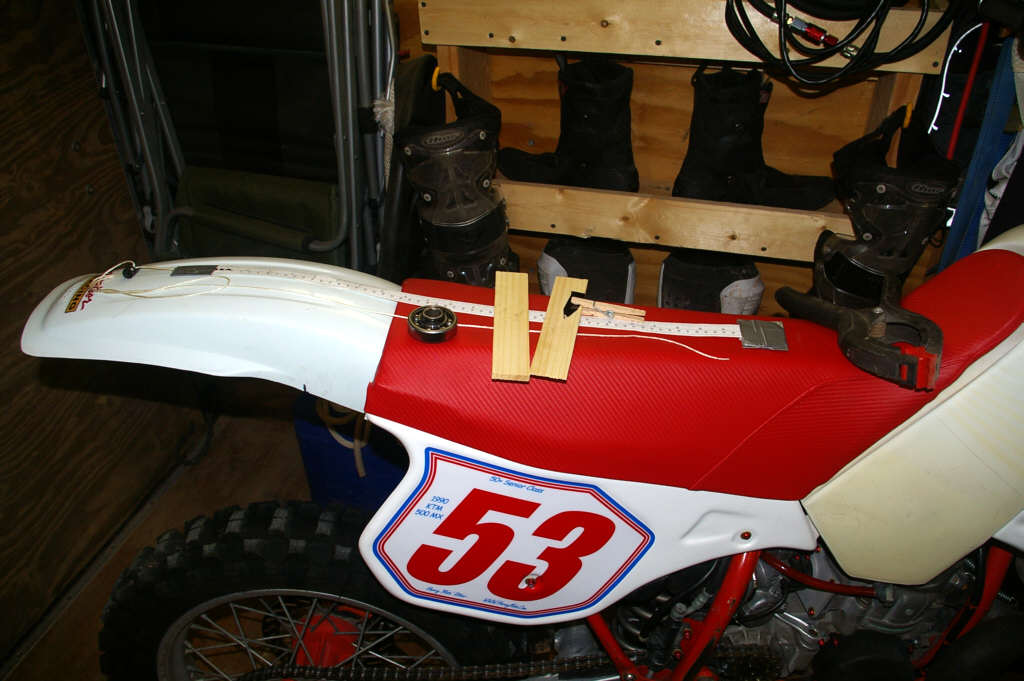
Now clamp the bearing to the side of the rear fender where you normally measure sag. The door shims protect your fender and more importantly help guide the paper tape. Putting the tape through the clamp like this makes the next steps easier.
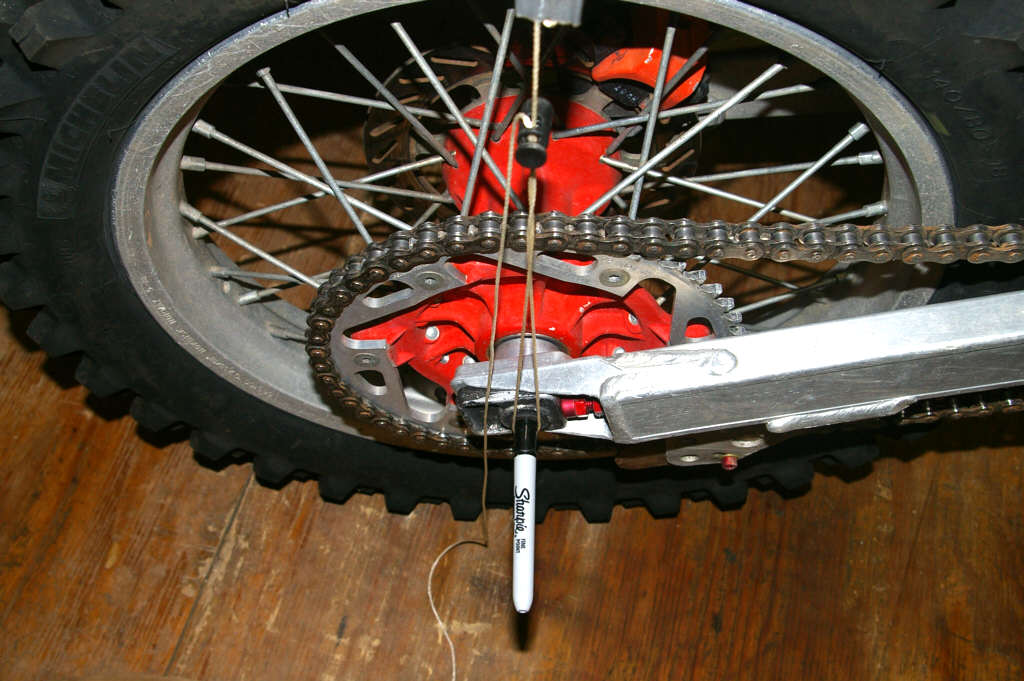
Now jam the sharpie into the rear axel, loop/tie/secure the string to the sharpie, and gently let the tape sit on the bearing. Put the washer gently down at the end of the tape, so it is hanging free.
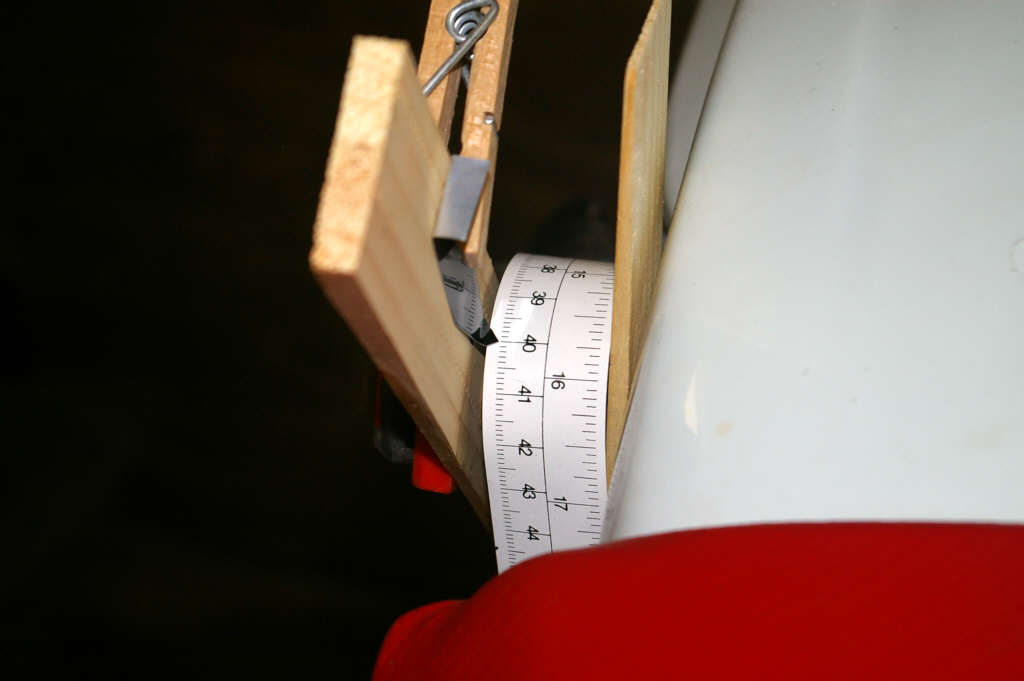
Clamp the pointer to the shim and adjust everything. I have my scooter on the lift stand, and have set the string and the pointer so that the tape reads 40 dead with the rear wheel fully extended. Write this number down, you have your base measurement!
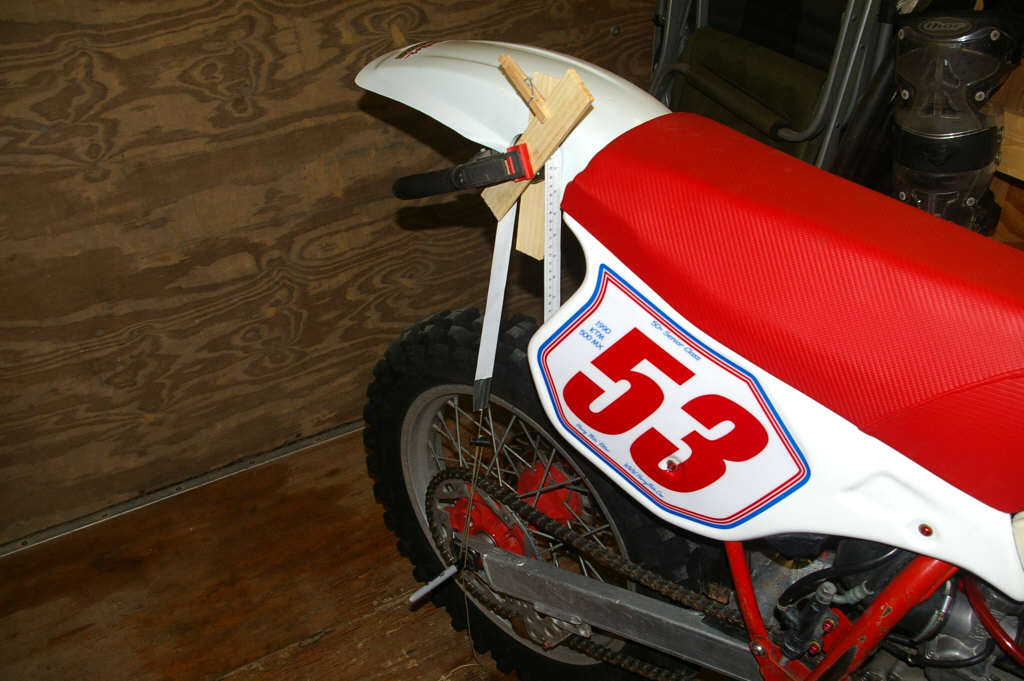
Here's my scoot sitting on it's wheels. So my static sag is 400mm minus 388mm, or 12mm. Easy!

Race sag is a little harder; you have to balance on the footpegs while twisting around to see the tape/pointer. The pic on the left was taken while one-handing the camera on a wide angle setting. I zoomed in some and took the second picture one handed as well. If you can get a decent picture of the measurement, you know it's pretty easy to just READ it!! Race sag comes in at 400mm minus 310mm, or 90mm. If you don't get it set to read on an even number, you can still write the numbers down and get it right without any assistance. For me, this means I can dink with it until I'm sure I have it right, not just until it looks like my helper has had enough. That, and I love getting my sag numbers in millimeters! ;-)